You will need:
glue dots
adhesive
Stampin' UP Whisper White craft pad (or white paint would work as well)
scissors
Crop a dile
ribbon
stipple brush
ruler
cardstock
embellishments of your choice
tin can top that was opened with a safety can opener. I got mine from The Pampered Chef (I have an order open until tomorrow if you'd like to order one or anything else PC for that matter! Let me know and I can let you know how to order online.)
I also used my Cricut to cut the circle of cardstock out.

Flip the can lid up so that the "lip" is directed up. Measure across the can lid inside the lip. Using the Cricut, I cut a circle the next size up from my cardstock.

My circle was a bit too big, so I hand trimmed it to fit inside the can lid.


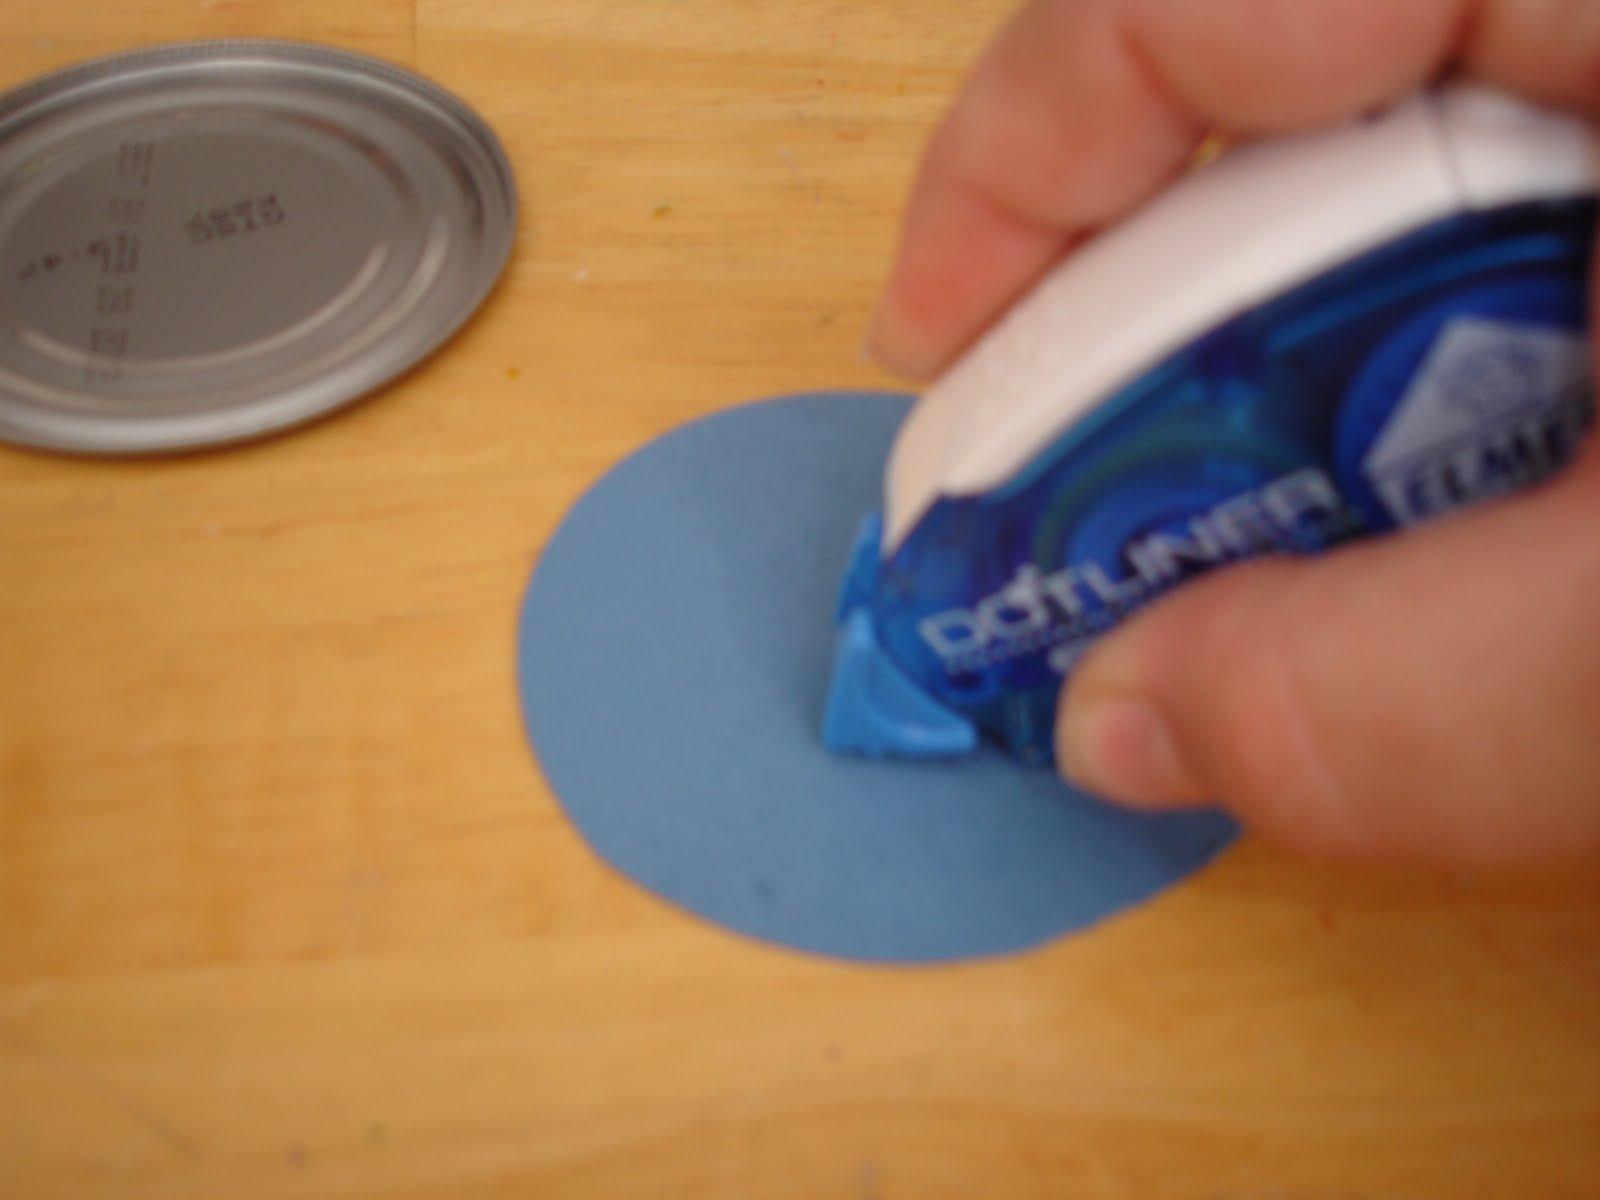
Apply adhesive to the back of the circle and adhere it onto the can lid. Mine wasn't too straight around the edges, but once you stipple the edges with paint or ink, it won't be noticeable.
I chose a plastic snowflake ornament that I had on hand. I bought these last year at a dollar store (Dollar Tree maybe?) and got several in a package for a dollar. I simply snapped the hanger circle off so it would look better and more uniform on my ornament.

Adhere snowflake/embellishment onto the cardstock using glue dots.

Dab the stipple brush on the ink pad or paint and stipple the edges of the cardstock and can lid.


After dabbing the edges of the ornament, you can heat set/dry it with an embossing gun or simply let it air dry.
Using the Crop a dile, punch a hole in the lid to run your ribbon through.


Cut approximately 8-10" of ribbon. Run ribbon through the hole and even the ends. Tie in a knot.

I also added a rhinestone to the center of my snowflake to finish the look.

Awesome, Martha, you sweet crafty little hillbilly! I love it!
ReplyDeleteI love it!
ReplyDelete